At last, at last, we have a summer worthy of it's name! There is lots of sunshine, it's wonderfully hot and sticky (I happen to love warm weather, even if it means covering my pasty skin in about an inch of sunscreen), terraces are full, people brought out their barbecues and ice cream parlors are sprouting like mushrooms.
It is not the ideal weather to bake fancy stuff, unless you have a really powerful air conditioning in your house (I don't), but a simple shortcake is very forgiving and almost impossible to mess up, even during a heatwave. It is a traditional Southern sweet, after all! It is also a very versatile, easy to assemble dessert that will look fancy and impressive when you serve it at your next garden (or balcony, whatever the case may be) party.
A shortcake is basically a layering of sweet biscuit, fruits macerated in sugar and whipped cream. It can be made as one big cake, but I find much cuter (and more practical) to make little individual shortcakes: you can prepare the biscuits in advance, freeze them and then garnish them as you need. Let's face it, shortcakes are tricky to slice, so a huge one is more likely to become messy than a bunch of small ones your guests can destroy as they see fit. This recipe will give you enough dough for 8 little helpings of happiness.
It's also a dessert that can be easily converted to a vegan treat: use a non-hydrogenated margarine instead of butter, non-sweetened almond milk and coconut milk whipped cream (this is my favorite recipe for the stuff), and voila! All the decadent, buttery pastry and the fluffy, dream-like whip... and none of the dairy!
A shortcake is basically a layering of sweet biscuit, fruits macerated in sugar and whipped cream. It can be made as one big cake, but I find much cuter (and more practical) to make little individual shortcakes: you can prepare the biscuits in advance, freeze them and then garnish them as you need. Let's face it, shortcakes are tricky to slice, so a huge one is more likely to become messy than a bunch of small ones your guests can destroy as they see fit. This recipe will give you enough dough for 8 little helpings of happiness.
It's also a dessert that can be easily converted to a vegan treat: use a non-hydrogenated margarine instead of butter, non-sweetened almond milk and coconut milk whipped cream (this is my favorite recipe for the stuff), and voila! All the decadent, buttery pastry and the fluffy, dream-like whip... and none of the dairy!
The local strawberries are in season, so that's what I used, but any kind of berry or fruit can be used in a shortcake. You could also mix and match your favorite fruits, or be really naughty and add chocolate chips to your shortcakes!
Biscuits:
2 cups all-purpose flour
1 tablespoon baking powder
1/2 teaspoon salt
3 tablespoons sugar
1/2 cup (1 stick butter), chilled
2/3 to 3/4 cup milk
2 cups all-purpose flour
1 tablespoon baking powder
1/2 teaspoon salt
3 tablespoons sugar
1/2 cup (1 stick butter), chilled
2/3 to 3/4 cup milk
Filling:
1 quart strawberries
1/3 cup sugar
1 quart strawberries
1/3 cup sugar
Garnish:
1 1/2 cups whipping cream
1 1/2 cups whipping cream
Rinse the berries under cold water; drain well. Hull and slice the berries and put them in a bowl. Sprinkle with the sugar, cover and let stand at room temperature for about 1 hour. This will sweeten the berries and also make them release some moisture, which will give you a lovely strawberry syrup at the bottom of the bowl.

Whip the cream (add 2 or 3 tablespoons of sugar, if desired) until it holds a soft peak. Cover and refrigerate until ready to serve. Preheat the oven to 425 degrees. Set the rack at center level. Whisk together the flour, baking powder, salt and sugar in a large bowl or food processor. Cut the butter into about 8 pieces and add to the mixture.

Pulse in a food processor (or work with a pastry cutter or clean fingertips - I personally prefer to prepare my dough completely by hand) until the mixture resembles coarse meal, but with few pea-size chunks of butter left in the mixture.

If you were using the food processor, transfer the mixture to a large bowl and make a well in the center. With a fork, stir in the milk, until the dough is just moist. Be very careful not to overwork. The dough doesn't have to hold together well at this point. Let the dough stand for a minute. Turn the dough out onto a lightly floured surface. Knead the dough 4 or 5 times, until it is holding together and is less sticky, sprinkling with flour as needed.

Gently pat the dough into a 6 by 12-inch rectangle about 3/4-inch thick and cut into 8 (3-inch) biscuits with a floured round cutter (you can use an old-fashioned glass if you do not have a cookie cutter). This can be tricky if your dough is not holding together well. Don't be shy to work it a little bit more until you can cut out your biscuits properly.

Pulse in a food processor (or work with a pastry cutter or clean fingertips - I personally prefer to prepare my dough completely by hand) until the mixture resembles coarse meal, but with few pea-size chunks of butter left in the mixture.

If you were using the food processor, transfer the mixture to a large bowl and make a well in the center. With a fork, stir in the milk, until the dough is just moist. Be very careful not to overwork. The dough doesn't have to hold together well at this point. Let the dough stand for a minute. Turn the dough out onto a lightly floured surface. Knead the dough 4 or 5 times, until it is holding together and is less sticky, sprinkling with flour as needed.

Gently pat the dough into a 6 by 12-inch rectangle about 3/4-inch thick and cut into 8 (3-inch) biscuits with a floured round cutter (you can use an old-fashioned glass if you do not have a cookie cutter). This can be tricky if your dough is not holding together well. Don't be shy to work it a little bit more until you can cut out your biscuits properly.


Carefully transfer to a cookie sheet lined with parchemin paper. Brush on a little milk and sprinkle with some sugar. Bake for 10 to 15 minutes, until the biscuits have risen and are golden brown. Remove to a platter and split each biscuit horizontally with a serrated knife.
Once the biscuits have cooled, top the lower half of each with a generous tablespoon of the berry mixture and a dollop of whipped cream. Replace the tops and finish with a tablespoon or so of berries and more whipped cream.


The pastry was light and buttery, but firm enough to be the vessel for piles of sweet strawberries and luscious whipped cream. We drizzled a bit of the strawberry syrup on top of each shortcake and they were stunning!

These are messy to eat, but messy in the best possible way! Home-made whipped cream is so easy to make, and the decadent taste and texture is totally worth the trouble. With the light, delicious pastry and the fresh fruit, this is quite a heavenly end to a nice summer meal. It's the perfect dessert to make for those who feel like they suck at baking and can't do fancy icing flowers: a shortcake should not look too perfect. The rustic look is definitely part of the charm, in my opinion.
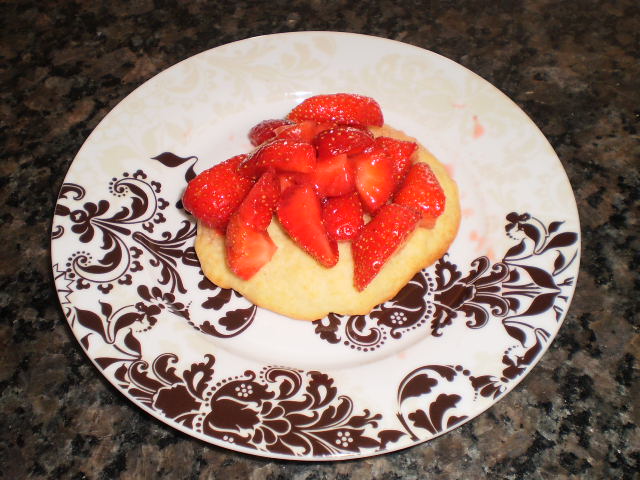


The pastry was light and buttery, but firm enough to be the vessel for piles of sweet strawberries and luscious whipped cream. We drizzled a bit of the strawberry syrup on top of each shortcake and they were stunning!

These are messy to eat, but messy in the best possible way! Home-made whipped cream is so easy to make, and the decadent taste and texture is totally worth the trouble. With the light, delicious pastry and the fresh fruit, this is quite a heavenly end to a nice summer meal. It's the perfect dessert to make for those who feel like they suck at baking and can't do fancy icing flowers: a shortcake should not look too perfect. The rustic look is definitely part of the charm, in my opinion.


