Showing posts with label vegetarian. Show all posts

Friday, 2 August 2013

Fresh Pasta Dough: A Novel

I can't believe it took me 28 years to get around to making pasta dough from scratch. I mean, I can't really go longer than 4 days without eating pasta before turning into a zombie-like creature who riffles through the pantry for a bag of spaghetti, eyes blood-shot and twitching. I should know how to make some of the stuff from the basic ingredients I always have at home... just in case...

But fresh pasta dough is a slightly intimidating recipe (at least, it was for me) and while my mother is very proud of her Italian heritage, she was also a single mom with 3 kids, leaving her little time for the delicate operation that is making your own fresh pasta, so it was one of those things I didn't get a chance to learn when I lived at home.

But I left home a long while ago: it was more than time for me to get on the task of pasta dough, but I was quite nervous to try it without some basic guidance. That was when my awesome friend Alex (king of pancakes) came to my rescue! He had the necessary know-how (an Italian chef's recipe) and hardware (the pasta-machine attachment for his Kitchen-Aid stand mixer). I hopped and skipped over to his place with my apron, and we made pasta!

What I learned is that just like pie crust dough and other so-called scary recipes, making pasta dough is a lot more simple than I anticipated! If you have a pasta machine (either the manual type or the attachment for the stand-mixer), it is time-consuming, granted, but also very straight-forward and simple. It's also a remarkably sensual process, because the only way to know if the dough is good and ready is by relying on how it feels as you are working and touching it.

Which means: no making pasta dough in a food processor!! Not ever. Get that idea out of your head right now, wash you hands, use them, and put your back into it when kneading! Alex's trick was to make me take a bit of a judo pose next to the counter (slightly on the side, right foot forward) and to make me support my weight against the counter with my right hand (I am right-handed). That is the kind of resistance you are supposed to feel when kneading pasta dough, and a food processor will never do the "stretch and fold" motion the way your hands will.

Also, when making pasta dough, clear a large working surface and keep it very clean, because this dough is sticky and will pick up anything that's laying around on the surface it's being worked on.

This recipe makes about a pound of pasta dough, which can then be cut into whatever shape your pretty little heart desires!

1 pound all-purpose flour (454 grams)
4 whole eggs
1 egg yolk
1/4 cup extra-virgin olive oil
1 to 2 tablespoons very cold water (keep a bowl of water with a couple of ice cubes in it)
Sprinkle of sea salt

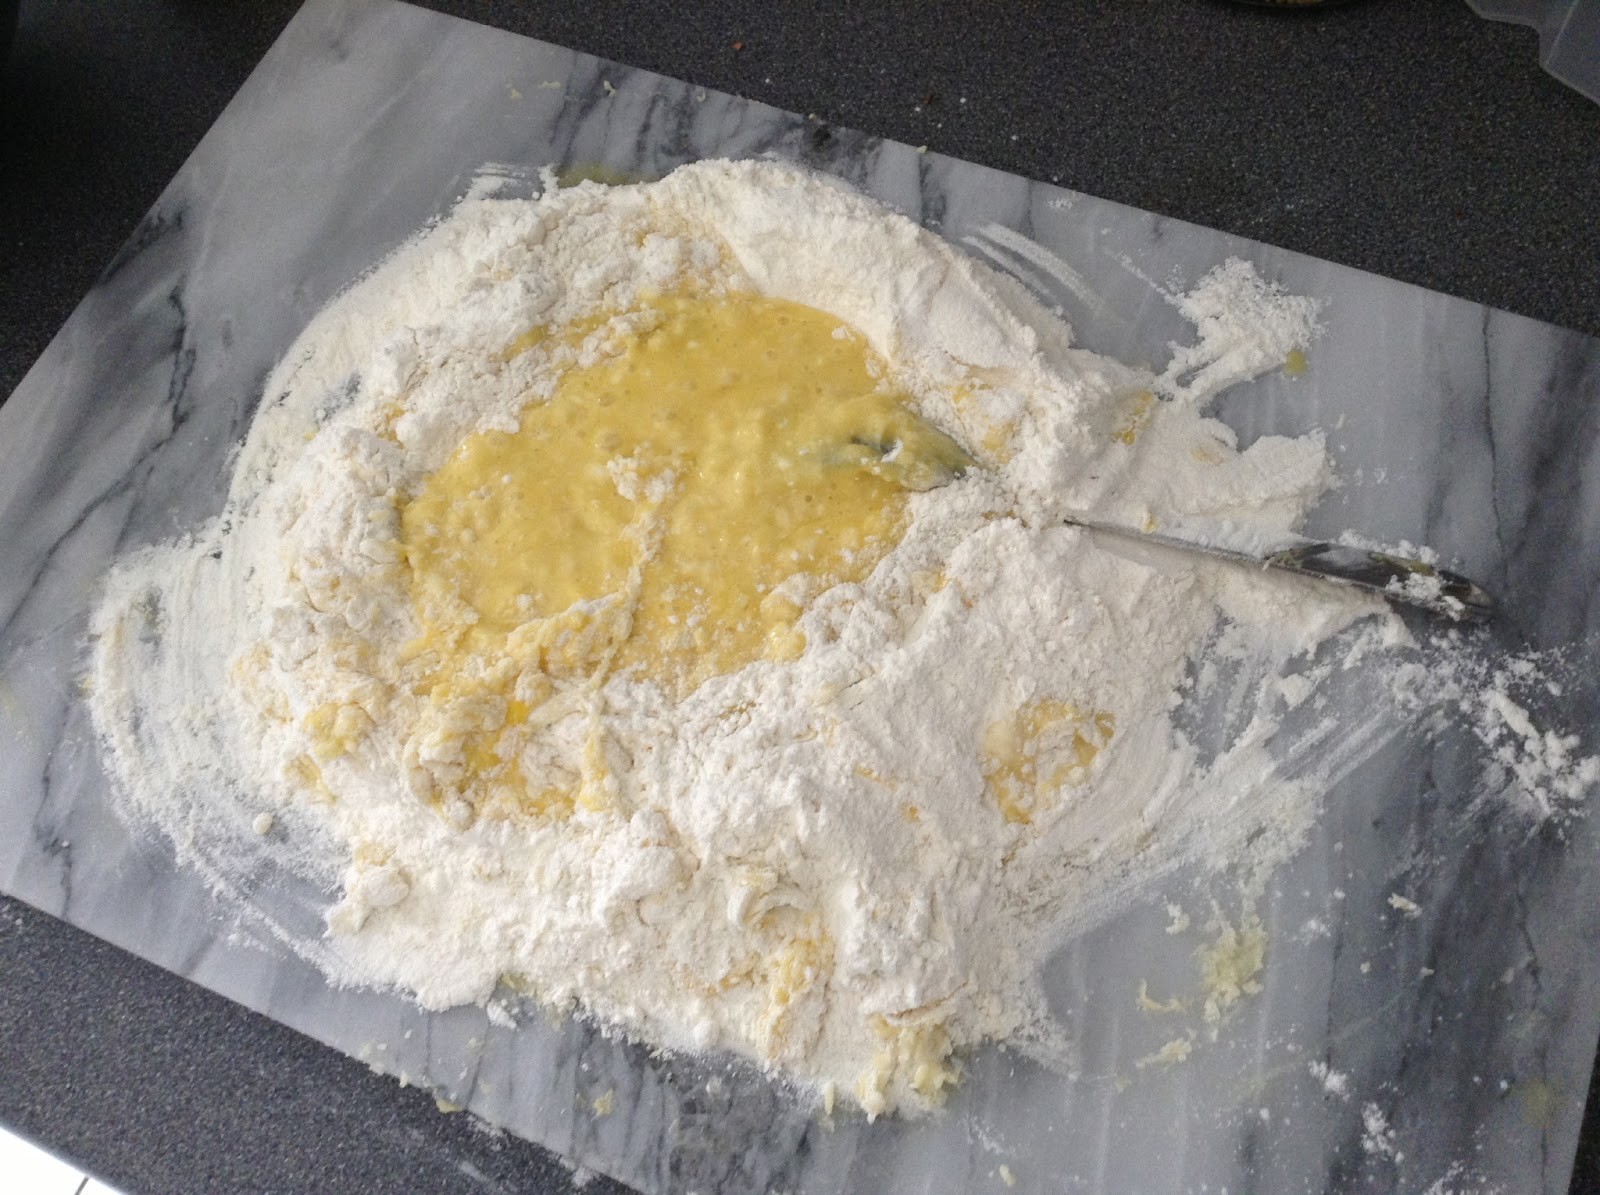
Put the flour on a clean work surface and form a deep well in the middle of the flour. Make sure the well is deep enough that it will not break when you pour the liquids in.


Put all the other ingredients in the well.


With a fork, mix the ingredients from the well and out towards the rest of the flour. Be careful not to break the well or things will get very messy.


Using a pastry scraper, scrape the sides of the well to get the flour in and continue mixing until the ingredients are forming a blob that holds itself.


Mix in any crumbs that fall out as soon as possible. Continue mixing until the dough is a ball.


Knead the ball of dough for about 10 minutes, by stretching, turning and folding it until it feels silky.


The dough is kneaded enough when it is pliable and stringy when it tears (this means gluten has developed).


Wrap the dough tightly in plastic and let rest for 30 minutes at room temperature (if using right away) or in the fridge (if using later). When ready to use, cut the ball of dough in manageable pieces and set the pasta machine on the largest setting.


Take a portion on the dough and flatten it by hand until it can be rolled. Roll the dough in the machine, fold the dough over itself, then adjust the machine to the second largest setting and roll it again. Fold the dough, adjust the machine to the third largest setting and roll it again. At first, the dough will be "veiny", a little bit like a leaf. The picture below shows dough that is not ready to use yet because you can still "see" the texture (it's not easy to capture on camera, but once you do it yourself, you can totally tell).


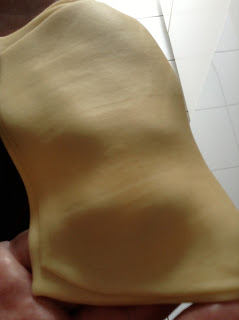
Repeat the three levels of rolling until the dough is uniform and very soft. This picture shows the super-smooth look of dough that is ready to be cut (again, tough to illustrate with a picture). It's really important to trust your senses here: the texture of rough-pasta dough versus ready-pasta dough is quite noticeable. It becomes incredibly light, smooth, silky and pleasant to touch.

Once the dough is ready, adjust the machine and roll it progressively (and I mean progressively! If you try to roll it too thin too fast, it will get caught in the machine and tear, and you will have to start all over again. Take. Your. Bloody. Time.) to desired thickness, then cut into the desired shape. Remember that pasta thickens as it cooks, so roll thinner than you expect to need it. It should have a nice elasticity, so don't be afraid to get it really thin, until it's a little translucent.


Most pasta machines come with cutter-rolls, that will allow you to just roll your sheet of pasta through and end up with a nice pile of fresh spaghetti or fettuccine. They also usually include what is know as a pasta bike, a little manual rolling cutter that you can use to make the little squares necessary to assemble stuffed pasta, like ravioli or tortellini.

When you cut your pieces of pasta, lay them carefully on a piece of parchemin paper until you are ready to use them. If you are making a lot of pasta and want to save space, simply cut a rectangle of parchemin paper, lay your cut dough on top, add another layer of parchemin, and so on until you are done.

If you have any dough you are not using, wrap it tightly in plastic wrap and either refrigerate it for a couple of days (bring it to room temperature before you start rolling it), or freeze it. It should keep in the fridge for about a month, like most egg doughs.

You can also dry your cut pasta to cook them later: sprinkle a bit of flour on top of your cut dough and let it air-dry for a few hours, then keep them in a sealed plastic container in the fridge until ready to cook.

Obviously, I wanted to cook with that pasta dough ASAP! The most forgiving recipes when you are still new at making fresh pasta dough is lasagnes, for a relatively obvious reason: no fancy shapes to cut! For a traditional Italian lasagne, you also need a lot of layers, so it's hard to waste fresh pasta dough on that. Alex is a mad genius who came up with an interesting and highly unusual lasagne idea that we had a lot of fun experimenting with and devouring... Stay tuned, because I will post that magnificent creation very soon!

Until then, here are a few more tips: fresh pasta cooks in hardly a couple of minutes in boiling water, so if you make linguini or agnolotti, your pasta will be ready before you've had time to blink. However, if you are baking them in a lasagne, it will take a bit longer to cook, and you really want them to fully cook: about 30 minutes in a 350 degree oven should do the trick. Undercooked fresh pasta has a very flour-y taste and texture that's not very appetizing.  On the other hand, if it is cooked well, it will all but melt your mouth.

I really want to give a huge thanks to Alex for opening his kitchen to my manic note and picture taking, and for patiently and generously sharing his knowledge with me. I had so much fun learning how to make pasta dough with him, and I learned tons of new things watching him cook. I am very impressed and humbled by the experience. I am also terribly jealous of his apron...


Thank you so much, Alex! And thanks for the pasta machine! Next time, it will be my turn to cook for you!!

Tuesday, 18 June 2013

Green (Day) Thai Curry

O.K., so before the purists get their self-righteous panties in a twist, I confess for the record that yes, I do like Green Day. There, I said it. And I also happen not to really give a rat's backside about whether they are real punks or posers. Their music is fun: it makes me feel like jumping up on tables and kicking crockery to the floor. Glorious, mindless, somewhat infantile fun. We all need that every once in a while. Get over it.

Now that we got that out of the way, let's talk about food! And another, equally fun, but somewhat more "serious" punk band.

I had prepared a big pot of this curry not that long ago, when I came back from a long weekend in Toronto, but by some devilry, all the pictures I took of it inexplicably vanished from my computer AND camera... so I had to start all over again... *deep breath* Here we go!

It takes a lot to get me off the island of Montreal, but wanting to see my favorite band live is a huge motivation that will get me into action-hero mode. That's just the kind of crazy I am, so on May 23rd, I packed a bag and dragged my boyfriend to Toronto for the sole purpose of seeing Anti-Flag destroy the Hard Luck Bar two nights in a row. Yup, that's how much I love those guys!


I had a complete blast, pogoed like a maniac, hurt my ankle (still don't really know how I did that...), ate some awesome food, saw the Patti Smith exhibit: really good times! And of course, the two shows were mind-blowing! There is a reason I am willing to travel over 500 km (300 miles, for my American buddies) to see those guys: they are fucking awesome!

But I was less than impressed upon my return, to find my beautiful Montreal under a cold and rainy sky reminiscent of what you'd expect in March... Sigh...

Curries are my favorite comfort food when the weather is chilly, because they are stick-to-your-ribs chunky and the mix of spices is very warming, so I decided to play around with what I had in the fridge and make a Thai curry that would keep me from shivering too much as I unpacked. It got nicknamed the Green Day curry because everything I threw in it (except the tofu and mushrooms) was green.


It got inspired by Nancie McDermott's method in "Real Vegetarian Thai", but the recipe is just as easily adaptable for vegans (use soy sauce) or carnivores (use chicken), but I kept this version vegetarian, mostly because it could be my culinary homage to Anti-Flag, who are vegetarians. By the way guys, if you are reading this and are ever in Montreal, I would be thrilled to whip up a big pot of this green wonder for you! (yes, yes: I am a hopeless fan-girl, piss off!)

1 (15-ounce) can coconut milk
3 tablespoons green curry paste
1 zucchini, cut into half-moons
1 bunch scallions, coarsely chopped
1/2 cup vegetable broth
1 tablespoon cane sugar
2 tablespoons fish sauce or soy sauce
1 lime, juiced
1 pound extra-firm tofu, drained and pressed, cut into small cubes
1 container shiitake mushroom, stems removed, and chopped
1 green bell pepper, diced
1/2 bunch fresh cilantro, coarsely chopped

Shake the can of coconut milk. Open it and spoon about 1/3 cup of it in a large pot and bring to a gentle boil over medium heat. Cook, stirring, until it thickens, about 3 minutes. Add the curry paste and cook for 3 more minutes, mashing, scraping and stirring until the paste is completely combined with the coconut milk (this is where an angled stir-fry spatula comes in handy).

 
Add the zucchini and scallions, and stir to coat them well in the curry paste.

 
Add the remaining coconut milk, vegetable stock, sugar, fish sauce (or soy sauce) and lime juice, and stir well.


Bring to a boil, then reduce the heat and simmer for 10 to 15 minutes, until the zucchini is tender. Taste the broth and adjust the seasoning. Add the tofu, mushrooms and bell pepper and stir gently. If you need to, add vegetable broth until the ingredients are just covered in liquid.


Let the curry return to a boil and remove from the heat. Let stand for 5 minutes before serving on jasmine rice, sprinkled with the fresh cilantro.


By the time I was done chopping everything, the sun had finally managed to get through the big grey clouds that welcomed me back home, but a big plate of those delicious veggies in a spicy, creamy broth really hit the spot. It was the perfect meal to enjoy after the long train ride and the eventful weekend, because it's easy to make and ready super quickly, which is a huge plus if you are starving because train food is... questionable...

This recipe is great to use up any vegetables that are laying around in the fridge, lonesome and forgotten, so you can adapt it to whatever you have left before going to the grocery store; just remember to add the firmer vegetables first, and the softer ones at the end!

I should also give a spice warning: green curry is the hottest Thai curry (yellow is the mildest, and red is in the middle), and while it has a wonderful and exotic flavor, if you have sensitive taste buds, go easy on the curry paste! There is also no need to add garlic or ginger (or galangal, which is the Thai ginger) to a green curry, because there is already a lot of those (along with lemongrass, white peppercorns and lime zest) in the paste. The heat will be smoothed out by the coconut milk, but you can add a bit of cane sugar if you prefer a sweeter bite.

Enjoy the curry... and up the punx!!

Thursday, 21 February 2013

Thai Eggplant Curry

I just love trying out new recipes, especially when they turn out to be fantastic finds! This little recipe (which I had shamefully overlooked for the past few weeks) is amazing for several reasons. Here they are in no particular order:
  • Its super easy and quick to make. Once the chopping is done, you'll hardly need 20 minutes to get your meal on the table. Perfect for week nights!
  • Its so tasty and flavorful, with the ginger, garlic, curry paste and coconut milk. Not too spicy, not too sweet; just awesome.
  • Its a gorgeous, colorful plate of vegetables. A bright dish can cure the kind of winter blues that afflict so many of us at this time of the year, and we can all use a bit more veggies in our plate!

Eggplant is great in curries because it absorbs the flavor of the other ingredients, turning into tasty and tender little bites as it simmers. You could use any type of eggplant for this recipe, but I prefer the long Japanese kind here. Pick them smooth-skinned and as brightly purple as you can find! Unlike regular European eggplant, there is no need to salt them before you cook: they do not have the occasional bitterness you find in the larger eggplants.

3 tablespoons peanut oil
1 1/2 pounds Asian eggplants, cut into half-moons (3 or 4 eggplants)
2 orange or red bell peppers, diced
3 cloves garlic, minced
1 or 2 tablespoons fresh ginger, chopped
3 tablespoons Thai red curry paste (I used Thai Kitchen)
1 (14 ounce) can coconut milk (or coconut cream, for a luxurious, richer curry)
2 tablespoons fish sauce (substitute soy sauce if you want to keep it vegan)
1 tablespoon light brown sugar
1/4 cup Thai basil leaves
Sea salt and freshly ground black pepper, to taste
Lime wedges, to garnish

Heat the oil in a large, deep pan over medium heat. Add the eggplants and bell pepper and sauté until the eggplant has begun to soften all around, about 5 minutes.


Add the garlic, ginger, and curry paste. Mix well until the paste covers all the other ingredients, and cook until aromatic, another 1 minute.


Pour in the coconut milk and bring the liquid to a simmer. Stir in the fish sauce and brown sugar. Cook for another 5 minutes, until the eggplant is very tender.


Stir in the Thai basil leaves and cook for another minute. Season to taste with salt and pepper. Serve with rice and lime wedges to squeeze over the curry.


You can bulk it up a bit more by adding 1 container of cremini mushrooms, thinly sliced, along with the other vegetables: their earthy flavor goes very well with the spicy, creamy sauce.

This recipe serves 4, but if you want to make it for a crowd or a pot-luck, double the coconut milk, garlic, ginger and curry paste, and add 1 pound of extra-firm tofu, drained, pressed and cut into 1/2-inch pieces, and add it to the pot when you set the curry to simmer. If you think there isn't enough liquid, add 1 cup of water or vegetable broth.

If you prefer green or yellow Thai curry to red, you should feel free to use those instead of the red curry paste. Just watch out because the level of heat varies from one "color" to the other, green being the hottest, and yellow the mildest.

It's the perfect quick dinner for those cold and damp February evenings!

Saturday, 2 February 2013

My Tomato-Basil Risotto

Since my best friend Véronique showed me how to make risotto, I was very eager to make more of the delicious, creamy, sticky rice dish. I made a very successful shrimp and lemon risotto this fall. Regular readers of this blog know how much I like the taste of tomato and basil, and when I was asked to bring a side-dish to a family meal, I decided to adapt the V-Wonder's recipe to make a big batch of gorgeous, gooey arborio to feed my in-laws.

The result was lip-smacking tasty, easy to pull-off and made a splendid and impressive offering to the big family meal. While it would be delicious devoured on it's own, it was also neutral enough to go along well with a wide range of main dishes.

Here is how to make this lovely and simple risotto, for 4 to 6 people:

1 (28 ounce) can whole tomatoes, drained, liquid reserved and tomatoes roughly chopped
Chicken or vegetable broth
6 tablespoons extra virgin olive oil
1 cup white wine
1 yellow onion, finely chopped
2 cloves garlic, finely chopped
2 cups arborio rice
1/2 tablespoon dried basil
1 small bunch fresh basil, leaves picked and finely chopped
Sea salt and freshly ground black pepper
2 tablespoons butter
1/2 cup freshly grated Parmigianno-Reggiano

Pour the juice from the can of tomatoes in a 4-cups measuring cup. Top with chicken broth until you have 4 cups of liquid. Pour that liquid in a small sauce pan, and heat over medium heat until it comes to a gentle boil. Reduce the heat to keep it simmering.


Pour 3 tablespoons of olive oil in a large pan, and on medium heat, sauté the onion and garlic until soft. Be careful not to brown the onion.


Sprinkle with the dried basil and add the tomatoes, being careful not to add any of the liquid from the can. Add the arborio rice and 3 tablespoons of olive oil, and stir so that all the grains of rice are coated in oil. Cook until the rice becomes translucent.


Add the wine and let it get fully absorbed by the rice, stirring constantly. Take a ladle-full of stock and add to the rice with a good pinch of salt. Stir to mix, and cook, stirring, until all the stock is absorbed.


Continue to add stock, one ladle at the time until the rice is al dente and creamy, 16 to 18 minutes. When adding the last ladle, also add the fresh basil leaves.


Take the rice off the heat, add butter, Parmigianno-Reggiano, pepper and mix well.


After trying it a few times, I have found that the trick to risotto is to use a wide pan (so that as much rice as possible gets heated up at the same time), an angled spatula to stir (to make sure no grain of arborio is left untouched - my stir-fry spatula is my favorite tool here), to taste often to test the rice's texture... and obviously to keep an eye on it. The change in texture and creaminess is visible as the cooking progresses and when you move the pan around and notice fluid waves of fragrant rice, you know you are on the right track. You also want to make sure nothing is sticking, so blast some good music, pour yourself a glass of wine and stir-away!

Sunday, 25 November 2012

Kashmiri Masala Tofu, Take 2

Recipes are not static. They evolve, and they change as you learn about new ingredients and new cooking techniques. I've blogged about my favorite go-to curry before, but like any good old recipe, I ended up tired of always making it the same way and had fun throwing a few different things in it.

Recipes (mine, and everybody else's) are not gospels. Quantities can be changed, spices can be omitted, ingredients can be substituted. That's what's awesome about cooking: unless you are baking (and therefore conducting a chemical experiment requiring great precision), you can be as creative as you like. Make a recipe one way today, then make it with different veggies tomorrow. Just taste as you cook; trust your taste buds, nose and eyes.

No one's perfect, and everybody cooks duds every once in a while. Everybody burns food, cuts fingertips, ruins cooking pots. It is not a tragedy, and despite how I feel about it when it happens, no one dies from fucking up dinner. Cooking means learning from your mistakes as much as it means enjoying your success.

Enough philosophy! Here is my re-vamped Kashmiri Masala tofu!

2 tablespoons peanut oil
2 cloves garlic, minced
1 tablespoon fresh ginger, chopped
1 yellow onion, diced
1 red bell pepper, diced
1/2 cup Kashmiri Masala paste
1 pound tofu, pressed and diced or cut into small triangles
1 (28 ounce) can diced tomatoes
1 cup plain yogurt (optional)

Preheat a large pan over medium heat. Fry the garlic, ginger, onion and bell pepper in a glug of oil.


When the onion is soft and golden, add the curry paste, and mix well so that the onions and bell pepper are coated in the paste.


Add tofu, and cook for about 10 minutes, stirring frequently, until the tofu is slightly browned on a few sides.


Add the tomatoes, and mix well. Cook for about 5 minutes, stirring often, until the liquid has reduced a bit. Bring the mixture to a boil, give the mixture a good stir, and simmer for 15 minutes, stirring occasionally.


Remove from the heat, stir in the yogurt (if using) and serve with basmati rice.


This curry never fails to be satisfying and filling: big chunks of veggies and tofu in a fragrant, spicy sauce; can't go wrong there! This version has red bell peppers, giving it a lovely crunch, and the extra diced tomatoes make it super-saucy. With the cold days right at our door, the vitamin C from the bell peppers and the powerful immune boosters and anti-oxidants of the ginger, garlic and other spices will be much appreciated by your body! Use cubed chicken breasts instead of the tofu for a meaty bite; just let it simmer 25 minutes instead of 15, to make sure the chicken is tender and cooked through.

Have fun with your recipes: the only risk you are taking is being pleasantly surprised with the outcome!

Monday, 1 October 2012

Pesto Lasagna or Lasagne Alla Genovese

Basil is one of those things I can't imagine living without. I use fresh leaves in my cooking at least 3 times a week, and what better time to use them than at their peak, right at the end of the summer heats? Basil will add a sweet herb-y taste to pasta sauces, meat dishes, and even desserts and cocktails! The plant is also lovely: keep it by a window where it will get lots of sunlight and generously water it everyday, and you'll always have fresh basil to flavor your food!

Pesto, it goes without saying, is one of my favorite things, ever. It's versatile, tasty, can be adjusted just to your taste, and it can easily be frozen for later use. I try to always have some pesto handy, because a tablespoon here or there can make almost any dish suddenly taste very sophisticated. Roast chicken? Pesto! Minestrone? Pesto! Grilled white fish? Pesto! The damn thing is addictive. So imagine a lasagne literally stuffed with it!!


This recipe makes a beautiful lasagne for hotter weather, because it is not as heavy as the tomato or meat sauce based ones, and if you make your own pesto, it is simply bursting with seasonal goodness (however, do not fool yourself into thinking this is diet lasagne!). Sure, it's a bit of work and a lot of assembling, like any lasagne, but the creamy blend of bechamel and pesto is to die for. It also looks really beautiful and smells amazing! I got inspired by a post of The Italian Dish, but used my own pesto and bechamel recipe to create this dream of a pasta bake.

10 to 20 lasagne noodles, pre-cooked (or no-boil lasagne noodles)

Pesto (makes about 1 cup):
2 cloves of garlic, chopped
3 large handfuls of fresh basil, leaves picked and chopped
Coarse sea salt
1 handful of pine nuts, lightly toasted
1 large handful of grated Parmesan cheese
Olive oil
Sea salt
1 squeeze of lemon juice

Bechamel (makes about 4 cups):
4 tablespoons (1/4 cup) butter
4 cups milk
4 tablespoons all-purpose flour
1/8 teaspoon grated nutmeg
1/4 teaspoon white pepper

Topping:
1 cup grated Parmesan cheese
1 cup grated mozzarella cheese
1 teaspoon dried oregano
Freshly ground black pepper

Pulse the garlic and basil in a food processor with a pinch of coarse sea salt. Add the pine nuts to the mixture and pulse again. Transfer to a bowl and add half the Parmesan. Stir gently and add olive oil slowly; you need just enough to bind the sauce and give it an oozy consistency. Season to taste and add most of the remaining cheese. Poor in more oil and taste again. Keep adding cheese and oil until you are happy with the taste and consistency. Add a little squeeze of lemon juice at the end.

In a heavy medium saucepan, melt the butter without letting it brown. Remove from the heat. Whisk in the flour, 1 tablespoon at the time until it is incorporated.


Heat up the milk in another cooking pot until just about to boil. Add ladlefuls of the milk to the butter and flour mixture. Put this mixture back on the heat and whisk. Add the nutmeg and white pepper.


When the milk is absorbed, add more, a little at the time and stir until all the milk is used up. Keep whisking until the sauce is velvety. If the sauce doesn't thicken, add some flour, one scant tablespoon at the time, stirring constantly until the desired texture is achieved.

Preheat oven to 350 degrees. In an 9 by 13-inch baking pan, place about 1/3 cup of the bechamel to coat the bottom of the pan. Lay first layer of lasagna noodles. Add enough bechamel to coat the noodles. Add some pesto and spread into the bechamel. Add a handful of the grated Parmesan.


Continue to layer the noodles, bechamel, pesto and Parmesan until the last layer of noodles (I got 4 layers of 3 noodles). On top of this, spread one layer of bechamel, add the rest of the Parmesan and top with the mozzarella.  Sprinkle the oregano on top.


Wrap tightly with foil. Bake for forty to forty-five minutes (if using regular, cooked noodles) or 50 minutes to one hour (if using no-boil noodles). Remove foil and bake for 10 minutes more, until top is golden. Check if the noodles are cooked through by piercing the lasagne with a fork. Cool 5 to 15 minutes before serving.


If you are a lasagne-newbie, you may be wondering if traditional pre-cooked noodles are better than no-boil noodles. While purists will want to kill me, I have to confess that I never really noticed a significant difference between the two: while pre-cooked noodles can have a more uniform texture, they can be harder to handle, and have a tendency to be sticky. No-boil noodles mean less dishes to clean, and a quicker assembly, but they need to cook longer...

Here is what you do if you want to pre-cook your noodles: cook them in boiling salted water, and take them out when they just start getting a bit malleable, after about 3 minutes. To make sure they do not stick together, lay the noodles, well separated, around the edges of the cooking pot and colander. When you assemble your lasagne, carefully lift them and lay them as desired in your baking dish. Do not cook them too early in the process because if they have time to dry out, they will become trickier to arrange.

If you are using no-boil noodles, make sure they are soaked in plenty of sauce because they absorb a lot of liquid. Leave the lasagne in the oven 10 to 15 minutes longer if you used no-boil noodles, and poke your lasagne with a fork, to make sure they are nicely cooked before cutting and serving.

Of course, if you are in a hurry, you can use store-bought pesto. I recommend the Fontaine Santé brand, because the consistency is nice and gooey, and not too paste-like (there is also no weird ingredients or preservative in that pesto, making it the sanest choice I have yet to find on the shelves). This is especially important in a baked pasta dish like this one, where the sauce helps cook the pasta. If the pesto is too thick, the results will not be as creamy.

I served this elegant lasagne to my pesto-loving brother, who almost licked his plate clean. Honestly, I was quite close to doing that myself. The sauce's texture thickens a bit in the oven, and mixes really nicely with the pesto: the Parmesan and crunchy golden mozzarella crust complemented the sauce perfectly. The only thing I might try differently would be mixing the bechamel and the pesto before spreading it on the noodles .

If you want to beef up this lasagne, add finely chopped broccoli or cauliflower (or both!) between the pesto and the Parmesan on the middle layers of noodles. The veggies will gently cook in the sauce, and you'll get healthy goodness with your luxurious pasta bake, making it somewhat less of a guilty pleasure. Serve it with a dry white wine, to balance out the sweet creaminess of the bechamel and the tang of the pesto.

Sunday, 1 July 2012

Grilled Apricot and Feta Salad

Feta is one of my favorite cheeses. The crumbly, yet creamy, salty goodness of a good feta is just divine in salads, and the summery recipe below is absolutely gorgeous. But be warned! It is for adventurous palates only! I found this little recipe in Nadia G.'s "Cookin' for Trouble". It's a fresh, tasty salad with a very posh look to it, so if you have guests to impress at any time this summer, this is a great way to start a stunning meal!

Fresh apricots are one of my favorite fruits, and when they are in season, I always make sure to have some handy. As delicious as they are just by themselves, or worked into desserts, they are also great in savory dishes because they are not overly sweet. In fact, they are perfect for those who, like me, enjoy a sweet-and-salty combo of flavors. For this recipe, pick them ripe, but still firm: you want them to keep their shape through the grilling process.

The dressing is an amazing blend of sweet honey and tangy wine vinegar. For dressing like this, a small food processor is the best tool you can get your hands on. I have mentioned it before, but small blender attachment for my Cusinart Smart Stick is the ultimate tool for making home-made salad dressings.

The pickled red onions have a piquant bite that's quite surprising paired with our lovely apricots. Onions prepared like that would also be delicious in other salads or as a garnish in hamburgers. Don't let them get too soft: their little toothy crunch is quite satisfying.

6 tablespoons olive oil
1/3 cup champagne or white wine vinegar
1 tablespoon creamed honey
1 teaspoon vanilla extract
1 garlic clove
1 tablespoon poppy seeds
Sea salt and ground pepper, to taste
8 apricots, halved and pitted
1/2 small red onion, finely sliced
1 cup crumbled feta cheese
Fresh mint leaves, for garnish

In a food processor, blend 4 tablespoons of olive oil, 3 tablespoons of champagne vinegar, honey, vanilla extract and garlic clove. Fold in the poppy seeds, sea salt and freshly ground pepper.


Heat a grilling pan to medium-high and pray with non-stick cooking spray. Baste the apricot halves with olive oil. Using tongs, sear the fleshy side of the apricots for 90 seconds to 3 minutes, and then turn over to sear the skin side for 1 minute or 2 more. Remove them from the heat and let them cool.


Heat a small saucepan over medium-high heat. Add the onion slices, pour in the rest of the champagne vinegar, stir and simmer until the onion slices turn bight pink, about 30 seconds. Remove from the heat and let cool slightly.

 
Divide the apricot halves equally among 4 plates. Sprinkle each serving with 1/4 cup of crumbled feta and a heaping tablespoon of pickled onions. Drizzle with the vinaigrette and garnish with fresh mint leaves.


How pretty is this?! This salad makes a perfect entrée for grilled fish or chicken dishes, or even a light lunch. A fruity rosé is always good on a warm summer day, and it goes especially well with this juicy, crunchy treat.

Only make as much as you need: cooked fruits like that tend to get very mushy and do not keep well as leftovers.