Sunday, 18 August 2013

Southern Barbecue Shrimps

I think one of my favorite things about home-cooking is the part where you get to sit down and share it with awesome people. Never has that been more true than Friday night, when I had dropped by my (now infamous) friend Paul's house to gossip (it happens), and his boyfriend Richard spontaneously invited me and my man for dinner. We quickly grabbed a few ingredients from the grocery store and Richard lit up the barbecue. Before you know it, we were all cooking, eating, drinking beer and having a great time! It was truly a moment of awesome urban-family time.

The recipe we made is quite simple, and a little tweaking of the spices could give it a whole other tone, but Paul has a thing for Southern cooking. Also, who am I to say no to shrimps marinated in garlic and butter? If you keep the marinating to a minimum, this meal takes less than an hour to make, and the results are wonderful! We kept it moderately spicy, but you can play with the quantity of cayenne depending on how sensitive your tongue is to heat.

about 60 medium shrimps, heads removed and deveined
1/4 cup unsalted butter
4 cloves garlic, minced
2 tablespoons lemon juice
1 teaspoon paprika
1 teaspoon cayenne
1 teaspoon tumeric
Sea salt and freshly ground pepper, to taste

Melt the butter in a sauce pan over medium-low heat. Once the butter is melted, add the garlic and cook for 3 more minutes, until the garlic is fragrant.


Remove from the heat and add the lemon juice, paprika, cayenne, tumeric, a touch of sea salt and ground pepper and mix well.


Place the shrimps in a large freezer bag or bowl and pour in the marinade. If needed, add a drizzle of olive oil and a little more lemon juice to make sure the marinade has an oozy consistence and covers the shrimps well. Shake the bag around (or mix everything well in the bowl) so that the marinade covers the shrimps well and let sit in the fridge for 30 minutes up to overnight.


When ready to cook, remove the shrimps from the bag or bowl, and pour the marinade in a small sauce pan. Bring to a boil, stirring constantly, then remove from the heat and reserve. Put the shrimps on wooden skewers (5 shrimps per skewer makes for 4 brochettes per helping).


Preheat a grilling pan (or barbecue, of course) over medium-high heat and spray with a touch of non-stick cooking spray. Cook the brochettes about 2 minutes on both sides, until the shrimps are pink and firm, basting them with the marinade.


We also grilled sliced ciabatta bread on the barbecue, brushed a bit of the deliciously zesty marinade on the crunchy croutons, and served the whole thing with a spicy rice pilaf.


What an incredibly tasty meal that was! Simple, and bursting with garlic and lemon flavors. The firm chewiness of the spicy shrimps on those croutons: my god!

You could be more reasonable than we were and grill yourself some bell peppers or corn on the cob, if you must have more veggies in there. Just don't forget to generously brush your veggies with olive oil and a pinch of sea salt as it grills!

It was Friday (in Verdun, no less), so we washed all that deliciousness down with some Sleeman beers, but if you feel fancy, a fruity white wine would rock those shrimps.

Sunday, 11 August 2013

Maple-Glazed Pork Tenderloin

If you've read my recipes for a while, you probably know how much I love maple syrup. You might also remember how happy I was when I discovered how delicious it is with pork chops. That recipe made me curious to see how else I could use the two ingredients together to make some tasty meals.

A recipe is mostly about a good balance of flavor (hence why sharp flavors like balsamic vinegar go so well with maple syrup), so I tested various amounts of garlic and Dijon mustard (another very good friend to pork) until I found the lip-smacking proportions that made the dish shine. I added a bit of heat with some chili flakes and it was perfect!

This recipe is now one of my weeknight life-savers: it's very easy, comes together in about 30 minutes and it is utterly delicious, in that wonderful, sticky-sweet and salty way. Add some mash potatoes (or fries, if you are feeling especially naughty) and some steamed, crispy veggies, and you have a gorgeous retro dinner to enjoy!

All-purpose flour, for dredging
1 pork tenderloin, about 1 pound
1 tablespoon butter
1 tablespoon olive oil
Sea salt and freshly ground black pepper
1 small onion, finely chopped
3 cloves garlic, finely chopped
1 teaspoon chili flakes, or more, to taste (I will use up to a tablespoon)
1 tablespoon dried thyme
1 1/2 tablespoon Dijon mustard
1/3 cup maple syrup

With the rack in the middle position, preheat the oven to 350 °F. Sometimes, cutting the tenderloin in half makes it easier to manipulate as you cook it (those loins can be BIG pieces of meat). Dust the tenderloins with flour.


In an ovenproof skillet (I used my cast iron pan), brown the meat in the butter and oil. Season with salt and pepper. Remove from the skillet. Set aside.


Add a little butter in the skillet, if necessary, and soften the onion along with the garlic, chili flakes and thyme. Add the mustard and maple syrup and simmer for about 1 minute, until it thickens.


Return the pork to the skillet and coat with the sauce.


Transfer the skillet to the oven, and bake for 20 to 30 minutes, depending on how done you like it. Remove from the oven and cover with aluminum foil. Let it rest for 5 minutes before slicing. Spoon some of the caramelized onions on top and serve garnished with fresh thyme.


The end result is so pretty, in a simple, understated elegant way. Be careful not to overcook the meat: tenderloin does have the word "tender" in it, and you definitely want that melt-in-your-mouth feeling when you tuck in. Everyone I have ever served this dish to (and a bunch of my friends who spied the picture on my Instagram) raved and begged for the recipe. Well, here it is, gluttons!!! Enjoy!

P.S. My friend Patrick tweaked the recipe a bit, and added about a shotglass worth of Disaronno to the sauce. The result made him make the following NC-17 statement: "If it this food had been sex, I would have been coming a few times each bite". This is by far the coolest recipe review, ever. I love you, Pat!!! xxxxx

Friday, 2 August 2013

Fresh Pasta Dough: A Novel

I can't believe it took me 28 years to get around to making pasta dough from scratch. I mean, I can't really go longer than 4 days without eating pasta before turning into a zombie-like creature who riffles through the pantry for a bag of spaghetti, eyes blood-shot and twitching. I should know how to make some of the stuff from the basic ingredients I always have at home... just in case...

But fresh pasta dough is a slightly intimidating recipe (at least, it was for me) and while my mother is very proud of her Italian heritage, she was also a single mom with 3 kids, leaving her little time for the delicate operation that is making your own fresh pasta, so it was one of those things I didn't get a chance to learn when I lived at home.

But I left home a long while ago: it was more than time for me to get on the task of pasta dough, but I was quite nervous to try it without some basic guidance. That was when my awesome friend Alex (king of pancakes) came to my rescue! He had the necessary know-how (an Italian chef's recipe) and hardware (the pasta-machine attachment for his Kitchen-Aid stand mixer). I hopped and skipped over to his place with my apron, and we made pasta!

What I learned is that just like pie crust dough and other so-called scary recipes, making pasta dough is a lot more simple than I anticipated! If you have a pasta machine (either the manual type or the attachment for the stand-mixer), it is time-consuming, granted, but also very straight-forward and simple. It's also a remarkably sensual process, because the only way to know if the dough is good and ready is by relying on how it feels as you are working and touching it.

Which means: no making pasta dough in a food processor!! Not ever. Get that idea out of your head right now, wash you hands, use them, and put your back into it when kneading! Alex's trick was to make me take a bit of a judo pose next to the counter (slightly on the side, right foot forward) and to make me support my weight against the counter with my right hand (I am right-handed). That is the kind of resistance you are supposed to feel when kneading pasta dough, and a food processor will never do the "stretch and fold" motion the way your hands will.

Also, when making pasta dough, clear a large working surface and keep it very clean, because this dough is sticky and will pick up anything that's laying around on the surface it's being worked on.

This recipe makes about a pound of pasta dough, which can then be cut into whatever shape your pretty little heart desires!

1 pound all-purpose flour (454 grams)
4 whole eggs
1 egg yolk
1/4 cup extra-virgin olive oil
1 to 2 tablespoons very cold water (keep a bowl of water with a couple of ice cubes in it)
Sprinkle of sea salt

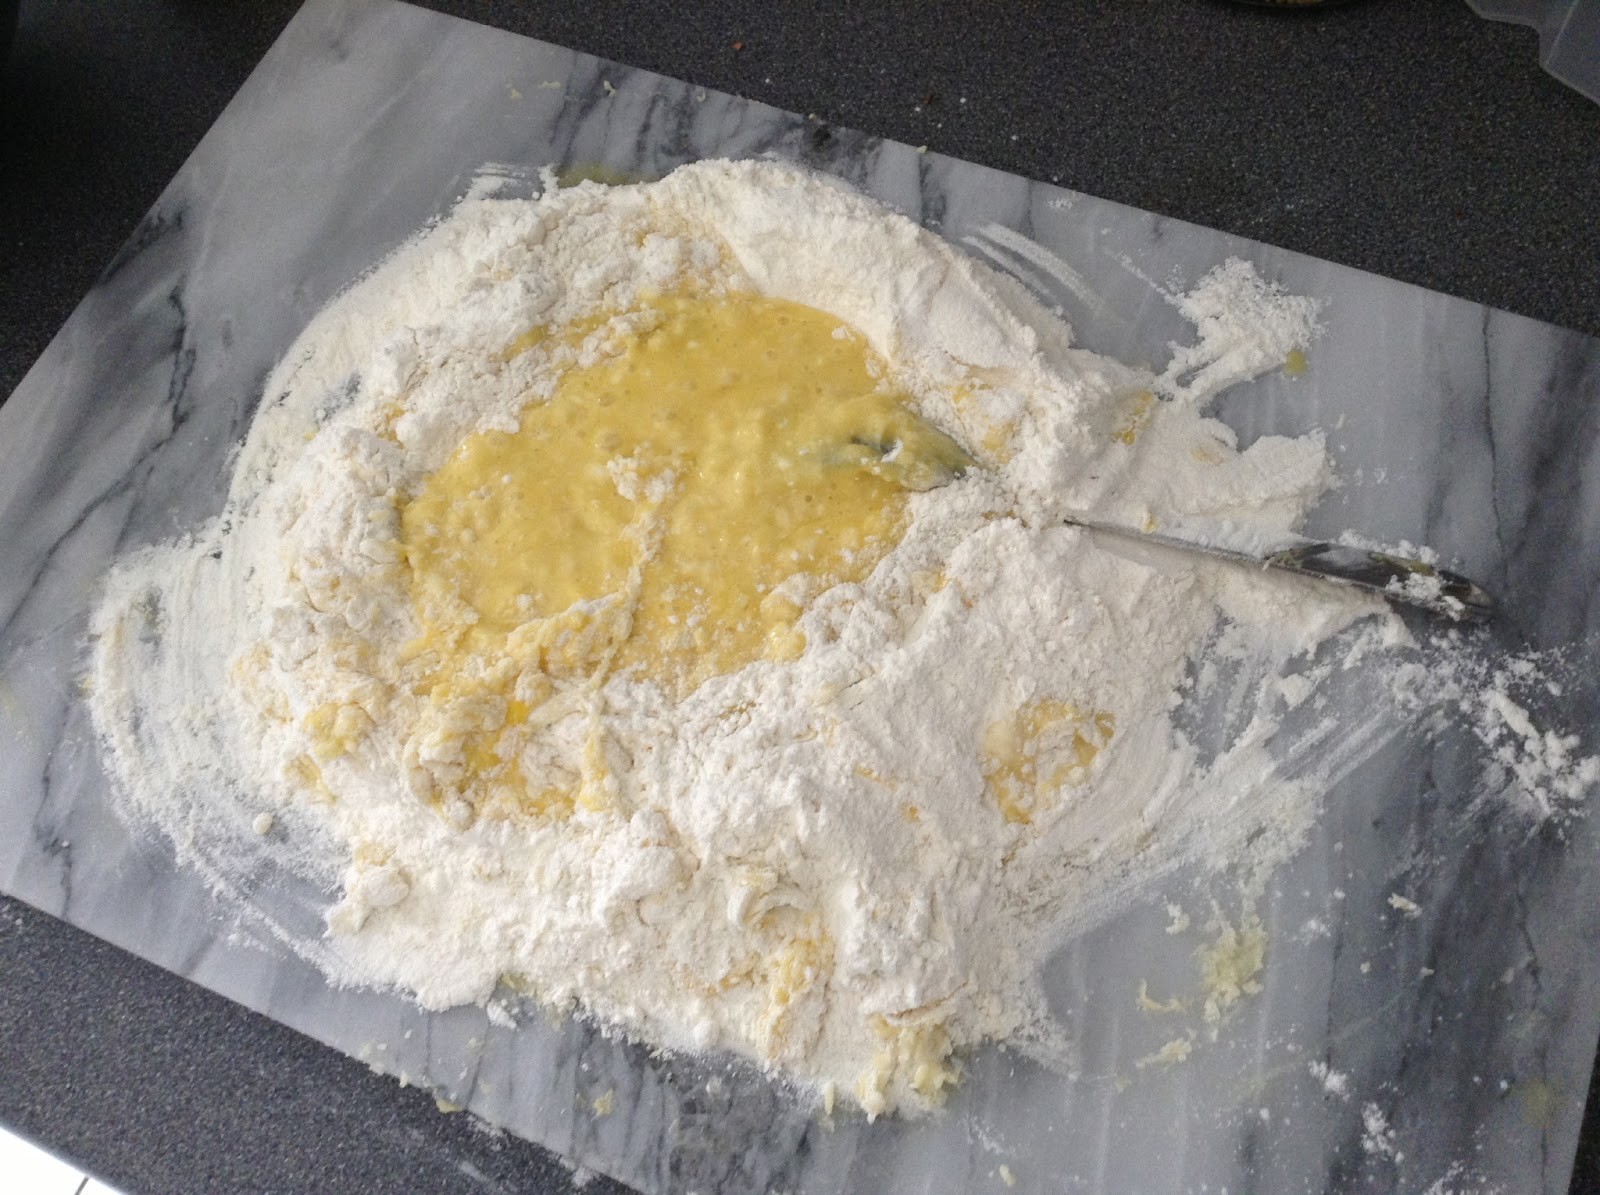
Put the flour on a clean work surface and form a deep well in the middle of the flour. Make sure the well is deep enough that it will not break when you pour the liquids in.


Put all the other ingredients in the well.


With a fork, mix the ingredients from the well and out towards the rest of the flour. Be careful not to break the well or things will get very messy.


Using a pastry scraper, scrape the sides of the well to get the flour in and continue mixing until the ingredients are forming a blob that holds itself.


Mix in any crumbs that fall out as soon as possible. Continue mixing until the dough is a ball.


Knead the ball of dough for about 10 minutes, by stretching, turning and folding it until it feels silky.


The dough is kneaded enough when it is pliable and stringy when it tears (this means gluten has developed).


Wrap the dough tightly in plastic and let rest for 30 minutes at room temperature (if using right away) or in the fridge (if using later). When ready to use, cut the ball of dough in manageable pieces and set the pasta machine on the largest setting.


Take a portion on the dough and flatten it by hand until it can be rolled. Roll the dough in the machine, fold the dough over itself, then adjust the machine to the second largest setting and roll it again. Fold the dough, adjust the machine to the third largest setting and roll it again. At first, the dough will be "veiny", a little bit like a leaf. The picture below shows dough that is not ready to use yet because you can still "see" the texture (it's not easy to capture on camera, but once you do it yourself, you can totally tell).


Repeat the three levels of rolling until the dough is uniform and very soft. This picture shows the super-smooth look of dough that is ready to be cut (again, tough to illustrate with a picture). It's really important to trust your senses here: the texture of rough-pasta dough versus ready-pasta dough is quite noticeable. It becomes incredibly light, smooth, silky and pleasant to touch.


Once the dough is ready, adjust the machine and roll it progressively (and I mean progressively! If you try to roll it too thin too fast, it will get caught in the machine and tear, and you will have to start all over again. Take. Your. Bloody. Time.) to desired thickness, then cut into the desired shape. Remember that pasta thickens as it cooks, so roll thinner than you expect to need it. It should have a nice elasticity, so don't be afraid to get it really thin, until it's a little translucent.


Most pasta machines come with cutter-rolls, that will allow you to just roll your sheet of pasta through and end up with a nice pile of fresh spaghetti or fettuccine. They also usually include what is know as a pasta bike, a little manual rolling cutter that you can use to make the little squares necessary to assemble stuffed pasta, like ravioli or tortellini.

When you cut your pieces of pasta, lay them carefully on a piece of parchemin paper until you are ready to use them. If you are making a lot of pasta and want to save space, simply cut a rectangle of parchemin paper, lay your cut dough on top, add another layer of parchemin, and so on until you are done.

If you have any dough you are not using, wrap it tightly in plastic wrap and either refrigerate it for a couple of days (bring it to room temperature before you start rolling it), or freeze it. It should keep in the fridge for about a month, like most egg doughs.

You can also dry your cut pasta to cook them later: sprinkle a bit of flour on top of your cut dough and let it air-dry for a few hours, then keep them in a sealed plastic container in the fridge until ready to cook.

Obviously, I wanted to cook with that pasta dough ASAP! The most forgiving recipes when you are still new at making fresh pasta dough is lasagnes, for a relatively obvious reason: no fancy shapes to cut! For a traditional Italian lasagne, you also need a lot of layers, so it's hard to waste fresh pasta dough on that. Alex is a mad genius who came up with an interesting and highly unusual lasagne idea that we had a lot of fun experimenting with and devouring... Stay tuned, because I will post that magnificent creation very soon!

Until then, here are a few more tips: fresh pasta cooks in hardly a couple of minutes in boiling water, so if you make linguini or agnolotti, your pasta will be ready before you've had time to blink. However, if you are baking them in a lasagne, it will take a bit longer to cook, and you really want them to fully cook: about 30 minutes in a 350 degree oven should do the trick. Undercooked fresh pasta has a very flour-y taste and texture that's not very appetizing.  On the other hand, if it is cooked well, it will all but melt your mouth.

I really want to give a huge thanks to Alex for opening his kitchen to my manic note and picture taking, and for patiently and generously sharing his knowledge with me. I had so much fun learning how to make pasta dough with him, and I learned tons of new things watching him cook. I am very impressed and humbled by the experience. I am also terribly jealous of his apron...


Thank you so much, Alex! And thanks for the pasta machine! Next time, it will be my turn to cook for you!!

Saturday, 27 July 2013

Cookies & Cream Cupcakes

Have you ever had a moment where you just can't choose what to eat to satisfy your sweet tooth? All the options look too good to pass up, and you wish you could just have all the desserts in the world at the same time (for those who might be wondering, no, I don't have a case of the munchies: I just get naturally really hungry)! Well this recipe is awesome, because you don't have to choose between having a cupcake or having a cookie: you CAN have them both at the same time!

I originally came across the idea of mashing those two desserts together while flipping through "Vegan Cupcakes Take Over the World", and I remember thinking that it was sheer brilliance. (As a side-note, you should totally get this book: the recipes are very original and inspiring, and they are easy!! Everything I have tried from it so far has been yummy, and didn't even really require the use of my stand mixer. If you are terrified of baking, this book will cure your fears!)

What is it about Oreo cookies that is so awesome? It really seems to bring the inner child out of everyone! Perhaps it's because kids have been dipping them in their milk for over a hundred years. Whatever the reason, they have been sneaked in many dessert recipes: brownies, ice cream sandwiches, pie crust, puddings, milk shakes... I occasionally indulge in Hershey's infamous Cookies & Cream candy bar, and I almost lost my mind when my boyfriend brought home a container of Nestle's Cookies & Cream ice cream... I can't get enough of those damn cookies in every form, so I just had to try the cupcake version...

I worked with the book's recipe, so those cupcakes are fully vegan, but if you have any basic, reliable chocolate cupcake and buttercream recipes you love, you should feel free to simply get yourself a bag of Oreos and tweak your own recipes just a little bit so you can get this spectacular dessert!

Start by getting 1 bag of Oreos, or other cream-sandwich cookies you like.

  • Coarsely chop about 10 cookies, for the batter (you need about 1 cup of coarse crumbs).
  • Separate the cookie from the cream of 5 more cookies, and finely mash the cookies, for the frosting (you need about 1/2 cup of those fine crumbs). This done really easily by putting your cookies in a plastic bag and mashing them with a rolling pin. Roll the rolling pin on the bag until the cookies are reduced to a fine crumb.
  • Slice 6 whole sandwich cookies in half-moons, for the final touch


1 cup unsweetened non-dairy milk (I usually use soy milk)
1 teaspoon apple cider vinegar
3/4 cup cane sugar
1/3 cup canola oil
1 teaspoon vanilla extract
1/2 teaspoon almond extract
1 cup all-purpose flour
1/3 cup cocoa powder
3/4 teaspoon baking soda
1/2 teaspoon baking powder
1/4 teaspoon salt

Preheat the oven to 350 degrees, and line a 12-muffins pan with cupcake liners. Whisk together the milk and vinegar in a large bowl, and set aside to curdle for a few minutes. Add the sugar, oil, vanilla extract and almond extract to the milk and beat until foamy.


In a separate bowl, sift together the flour, cocoa powder, baking soda, baking powder and salt. Add the coarse cookie crumbs to the dry ingredients, and mix.


Add the dry mixture in 2 batches to the wet ingredients, and beat until there are no large lumps left (a few tiny lumps is OK). Divide the batter into the liners, filling them about 3/4 of the way.


Bake for 18 to 20 minutes, until a toothpick inserted in the middle comes out clean. Transfer to a cooling rack and let the cupcakes cool completely before frosting.


1/2 cup non-hydrogenated vegetable shortening, at room temperature
1/2 cup non-hydrogenated margarine, at room temperature
3 1/2 cup confectioners' sugar (you may need a little bit more or less, depending on how stiff you want your buttercream)
1 1/2 teaspoon vanilla extract
1/4 cup unsweetened soy milk

Beat the shortening and margarine together until well combined and fluffy.


Add the sugar and beat for 3 more minutes, add the vanilla extract and soy milk, and beat for another 5 to 7 minutes, until fluffy.


Add the fine cookie crumbs, and mix until they are uniformly combined to the frosting.


When the cupcakes have cooled, generously pile on some frosting (a rubber spatula is your best friend for this step), and crown each cupcake with half a sandwich cookie (don't try to pipe that frosting down: the little cookie bits make that rather complicated and frustrating).


I have to say, even if I usually prefer using real butter in baking, this cupcake recipe really does make a perfect, moist and tender chocolate cake that will fool a traditionalist' palate: no one would ever guess this is egg and dairy-free! And while the words "vegan buttercream" make me roll my eyes, this icing is thick, fluffy, sweet and indulgent. The assembled cupcakes are also the cutest thing.


And they taste exactly like cookies & cream ice cream... Make sure to a have a nice big glass of (non-dairy... let's keep this vegan, shall we?) milk to wash all that delicious sweetness down.

Friday, 19 July 2013

Old-Fashionned Strawberry Shortcakes

At last, at last, we have a summer worthy of it's name! There is lots of sunshine, it's wonderfully hot and sticky (I happen to love warm weather, even if it means covering my pasty skin in about an inch of sunscreen), terraces are full, people brought out their barbecues and ice cream parlors are sprouting like mushrooms.

It is not the ideal weather to bake fancy stuff, unless you have a really powerful air conditioning in your house (I don't), but a simple shortcake is very forgiving and almost impossible to mess up, even during a heatwave. It is a traditional Southern sweet, after all! It is also a very versatile, easy to assemble dessert that will look fancy and impressive when you serve it at your next garden (or balcony, whatever the case may be) party.

A shortcake is basically a layering of sweet biscuit, fruits macerated in sugar and whipped cream. It can be made as one big cake, but I find much cuter (and more practical) to make little individual shortcakes: you can prepare the biscuits in advance, freeze them and then garnish them as you need. Let's face it, shortcakes are tricky to slice, so a huge one is more likely to become messy than a bunch of small ones your guests can destroy as they see fit. This recipe will give you enough dough for 8 little helpings of happiness.

It's also a dessert that can be easily converted to a vegan treat: use a non-hydrogenated margarine instead of butter, non-sweetened almond milk and coconut milk whipped cream (this is my favorite recipe for the stuff), and voila! All the decadent, buttery pastry and the fluffy, dream-like whip... and none of the dairy!

The local strawberries are in season, so that's what I used, but any kind of berry or fruit can be used in a shortcake. You could also mix and match your favorite fruits, or be really naughty and add chocolate chips to your shortcakes!

Biscuits:
2 cups all-purpose flour
1 tablespoon baking powder
1/2 teaspoon salt
3 tablespoons sugar
1/2 cup (1 stick butter), chilled
2/3 to 3/4 cup milk

Filling:
1 quart strawberries
1/3 cup sugar 

Garnish:
1 1/2 cups whipping cream

Rinse the berries under cold water; drain well. Hull and slice the berries and put them in a bowl. Sprinkle with the sugar, cover and let stand at room temperature for about 1 hour. This will sweeten the berries and also make them release some moisture, which will give you a lovely strawberry syrup at the bottom of the bowl.


Whip the cream (add 2 or 3 tablespoons of sugar, if desired) until it holds a soft peak. Cover and refrigerate until ready to serve. Preheat the oven to 425 degrees. Set the rack at center level. Whisk together the flour, baking powder, salt and sugar in a large bowl or food processor. Cut the butter into about 8 pieces and add to the mixture.


Pulse in a food processor (or work with a pastry cutter or clean fingertips - I personally prefer to prepare my dough completely by hand) until the mixture resembles coarse meal, but with few pea-size chunks of butter left in the mixture.


If you were using the food processor, transfer the mixture to a large bowl and make a well in the center. With a fork, stir in the milk, until the dough is just moist. Be very careful not to overwork. The dough doesn't have to hold together well at this point. Let the dough stand for a minute. Turn the dough out onto a lightly floured surface. Knead the dough 4 or 5 times, until it is holding together and is less sticky, sprinkling with flour as needed.

 
Gently pat the dough into a 6 by 12-inch rectangle about 3/4-inch thick and cut into 8 (3-inch) biscuits with a floured round cutter (you can use an old-fashioned glass if you do not have a cookie cutter). This can be tricky if your dough is not holding together well. Don't be shy to work it a little bit more until you can cut out your biscuits properly.


Carefully transfer to a cookie sheet lined with parchemin paper. Brush on a little milk and sprinkle with some sugar. Bake for 10 to 15 minutes, until the biscuits have risen and are golden brown. Remove to a platter and split each biscuit horizontally with a serrated knife.

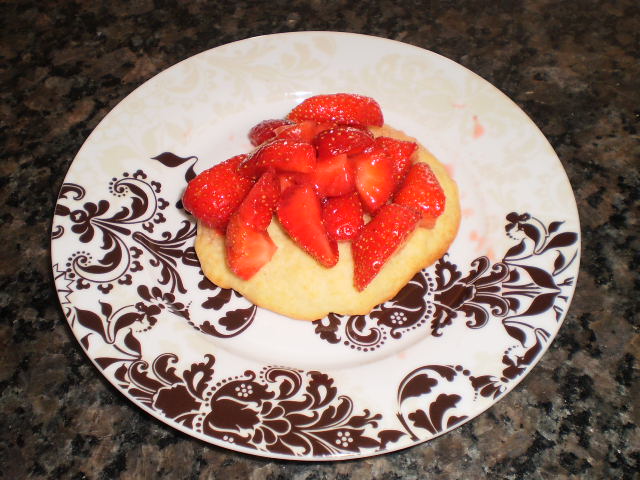
Once the biscuits have cooled, top the lower half of each with a generous tablespoon of the berry mixture and a dollop of whipped cream. Replace the tops and finish with a tablespoon or so of berries and more whipped cream.


The pastry was light and buttery, but firm enough to be the vessel for piles of sweet strawberries and luscious whipped cream. We drizzled a bit of the strawberry syrup on top of each shortcake and they were stunning!


These are messy to eat, but messy in the best possible way! Home-made whipped cream is so easy to make, and the decadent taste and texture is totally worth the trouble. With the light, delicious pastry and the fresh fruit, this is quite a heavenly end to a nice summer meal. It's the perfect dessert to make for those who feel like they suck at baking and can't do fancy icing flowers: a shortcake should not look too perfect. The rustic look is definitely part of the charm, in my opinion.

Friday, 12 July 2013

Chana Masala

Being on vacation makes me hungry. I don't know why, but I feel like I can never wait for the next meal, and since I have plenty of time to cook on my hands, I hunt down new ideas and new recipes that I can play with at my leisure. That's my favorite way to cook: glass of wine in hand, with Gogol Bordello blasting in the background. THAT is the good life!

One of the recipes I couldn't wait to try was some chana masala. I love chickpeas: they are so cute, tasty and versatile! I also love Indian cuisine, so when I found some recipes for chickpea curry, I started to drool. My beloved beans in a spicy stew with ginger and tomatoes?! Heaven!

I combined elements from a couple of recipes I found. It's a bit of a lazy version: I used canned beans and tomatoes, because I am not nearly patient enough to soak and cook dry chickpeas, and because I was fresh out of local tomatoes. Damn. If you have the time and the tomatoes, by all means, use them! Also, some traditionalists call for the tomatoes, onions, ginger and garlic to be pureed together before being cooked. I personally like my curries to be chunky and rustic, so I simply cut everything really small, so that it would still be saucy, but I would get the lovely tasty bits of onion and ginger...

With dishes like this one, that require the adding of a large variety of spices at the same time, I like to measure all my spices and mix them together in a small bowl so that I can literally add them all to the pot of a flick of the wrist. No time wasted scrambling about with measuring spoons while the onions burn and stick to the bottom of the pan!


One last note! If you can find amchoor powder (dry mango powder), you need to do 2 things:
1- tell me where you bought it: I couldn't find any at my usual bulk spices haunts...
2- use 1 tablespoon of it in your spice mix, and only use the juice of 1/2 lemon: amchoor powder adds a citrusy taste so will you need less lemon juice if you use it.

Without further ado, here is the recipe I came up with (with a little help from Madhur Jaffrey and Smitten Kitchen)!

1 tablespoon peanut oil
2 medium onions, finely diced
2 cloves garlic, finely chopped
2 tablespoons fresh ginger, finely chopped
1 fresh chile, chopped small
1 tablespoon ground coriander
2 teaspoons ground cumin
1/2 teaspoon cayenne pepper
1 teaspoon turmeric
2 teaspoons paprika
1 teaspoon garam masala
1 (15-ounce) can of diced tomatoes, with their juice (or 2 cups of fresh tomatoes, cut small)
2/3 cup water
2 (15-ounce) cans chickpeas, drained and rinsed (or 4 cups of soaked and cooked chickpeas)
1/2 teaspoon salt
1 lemon, juiced
1 tablespoon yoghurt, preferably Balkan-style (optional)
Lemon quarters, for garnish
2 tablespoons fresh cilantro, chopped, for garnish

Heat the oil in a large skillet. Add the onion, garlic, ginger and chili pepper and sauté over medium heat until the onion begins to brown, about 5 minutes.


Turn heat down to medium-low and add the coriander, cumin, cayenne, turmeric, paprika and garam masala.


Cook the onion mixture with the spices for a minute or two, then add the tomatoes.


Add the chickpeas and carefully pour the water in so it just covers the other ingredients.


Simmer uncovered for 10 minutes, then stir in the salt, lemon juice and yoghurt (if using). Serve with basmati rice, lemon wedges and a sprinkling of chopped cilantro.


The smell of this curry is amazing! And it comes together in a snap; the hardest part if definitely the chopping. Though I admit that not sneaking spoonfuls of the stuff out of the pot while it was cooking was a challenge. It just smelled so damn good...


And it tasted as good as it smelled! Hot and spicy, but not too much, with the lovely sour kick of the lemon. A good balance between the heat and the sourness is often the make-or-break factor of a good curry, and the proportions in this recipe are really flawless.

I enjoyed a nice glass of C'est La Vie rose wine with my plate, and it was a perfect refreshing match for the sharp flavors of the curry.

There is a Pakistani version of chana masala called aloo chole, which is essentially the same recipe, with the addition of 2 medium potatoes, peeled, boiled and diced, and added to the curry along with the chickpeas (some people fry the potatoes instead of boiling them... how naughty!). Who doesn't love potatoes? You can certainly add them if you want to, but personally, I prefer chana masala in the summer, and aloo chole in the winter, when a nice starchy root veg adds a "comfort food" vibe to a simmered dish.

This curry reheats very well, so the leftovers are perfect for the next day's lunch. If anything, waiting a bit makes the taste of the spices more defined and delicious!